Understanding Long Exposure Photography
What is Long Exposure Photography?
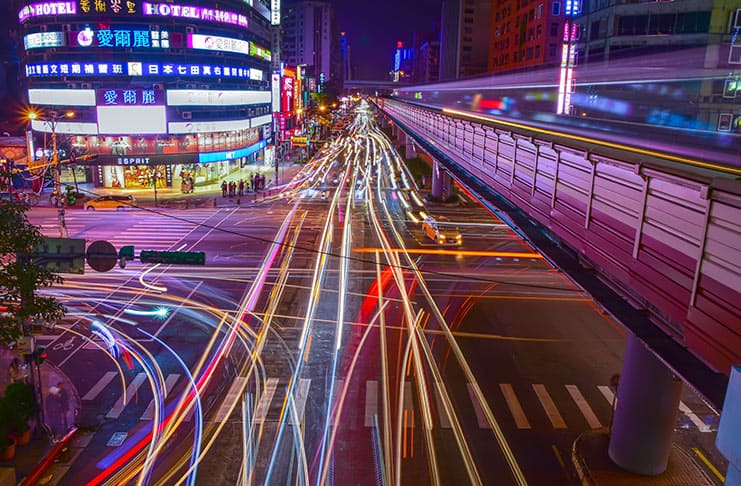
Long exposure photography involves using a slower shutter speed to capture images over an extended period. This technique creates unique effects such as motion blur, light trails, and smoothing water surfaces. On the iPhone, this was traditionally challenging due to limited manual control, but recent updates allow for more creative possibilities.
Table of Contents
Advantages of Long Exposure on iPhone
The iPhone’s advanced camera capabilities have made it possible to experiment with long exposure photography without investing in specialized gear. This opens doors for creative enthusiasts to capture captivating shots without carrying around heavy equipment.
Types of Scenes Ideal for Long Exposure
Long exposure works wonders in various scenarios. Waterfalls and flowing water scenes benefit from silky-smooth water effects. Traffic trails and light streaks come alive at night, transforming mundane cityscapes into vibrant, dynamic scenes. Star trails and night skies become mesmerizing with the iPhone’s ability to capture celestial movements.
Essential Equipment and Accessories
Tripods and Stabilization
Stability is crucial for long exposures. A tripod keeps your iPhone steady, eliminating unwanted camera shake and ensuring sharp images.
ND Filters for Controlling Light
Neutral Density (ND) filters are essential for daytime long exposures. They reduce the amount of light entering the camera, allowing you to use longer shutter speeds even in bright conditions.
Remote Shutter Release for Sharpness
A remote shutter release minimizes camera shake when capturing long exposures. It’s a small investment that significantly enhances image sharpness.
Preparing Your iPhone Settings
A. Accessing the Camera App
Open the Camera app on your iPhone to begin capturing long exposures.
B. Switching to Manual (Pro) Mode
Swipe up to access the control panel and tap on the “Pro” or “Manual” mode. This grants you control over critical settings.
C. Enabling Live Photo Mode
Turn on Live Photo mode to ensure the iPhone captures both the long exposure and a short video clip, preserving the context of the scene.
Choosing the Right Scene
A. Waterfalls and Flowing Water
Find a waterfall or stream with flowing water to create the classic silky water effect, transforming the water’s movement into a smooth, ethereal scene.
B. Traffic Trails and Light Streaks
Capture moving traffic at night to capture captivating light streaks, making the city come alive with vibrant colors.
C. Star Trails and Night Sky
For star trails, pick a clear night and shoot in a dark area. The iPhone’s extended exposure capabilities reveal the stunning motion of the stars.
Setting Up Your iPhone on a Tripod
A. Stable Base for Sharp Shots
Place your iPhone on a stable tripod to eliminate any chance of camera shake.
B. Leveling the Horizon
Use the built-in level feature to ensure your horizon is straight and avoid tilted shots.
C. Securing Your iPhone
Use a smartphone holder or clamp to securely attach your iPhone to the tripod, preventing accidents.
Continue to Part 2…
